TODO Application Tutorial with Single-Layer Solution
This is a single-part quick-start tutorial to build a simple todo application with the ABP. Here's a screenshot from the final application:

You can find the source code of the completed application here.
This documentation has a video tutorial on YouTube!! You can watch it here:
Pre-Requirements
An IDE (e.g. Visual Studio) that supports .NET 8.0+ development.
Creating a New Solution
In this tutorial, we will use the ABP CLI to create the sample application with the ABP. You can run the following command in a command-line terminal to install the ABP CLI, if you haven't installed it yet:
dotnet tool install -g Volo.Abp.Studio.Cli
Then create an empty folder, open a command-line terminal and execute the following command in the terminal:
abp new TodoApp -t app-nolayers -u angular -d mongodb
This will create a new solution, named TodoApp, with angular and aspnet-core folders. Once the solution is ready, open the solution (in the aspnet-core folder) with your favorite IDE.
Before Running the Application
You can skip to the Run the Application section if you have created the solution using the ABP CLI. It automatically performs the following steps. However, sometimes these steps might need to be manually done. For example, you need to perform them if you have cloned the application code from a source control system.
Creating the Database
You can run the following command in the root directory of your project (in the same folder of the .csproj file) to create the database and seed the initial data:
dotnet run --migrate-database
This command will create the database and seed the initial data for you. You could also execute the migrate-database.ps1 script that is included in the root folder of the solution.
Installing the Client-Side Packages
Run the abp install-libs command on the root directory of your solution to install all required NPM packages:
abp install-libs
We suggest you install Yarn to prevent possible package inconsistencies, if you haven't installed it yet.
Run the Application
It is good to run the application before starting the development. The solution has two main applications:
TodoApp(in the .NET solution) hosts the server-side HTTP API, so the Angular application can consume it. (server-side application)angularfolder contains the Angular application. (client-side application)
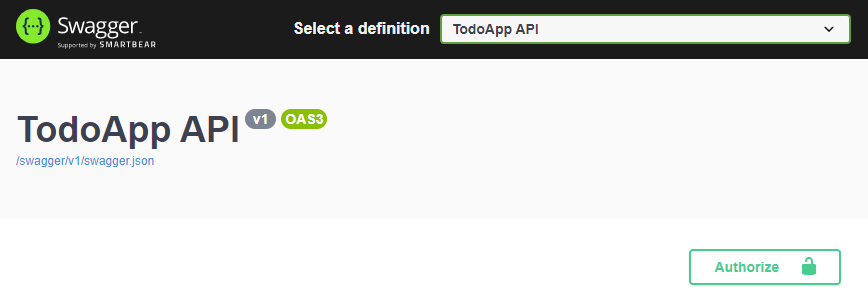
Firstly, run the TodoApp project in your favorite IDE (or run the dotnet run CLI command on your project directory) to see the server-side HTTP API on Swagger UI:

You can explore and test your HTTP API with this UI. If it works, then we can run the Angular client application.
You can run the application using the following (or yarn start) command:
npm start
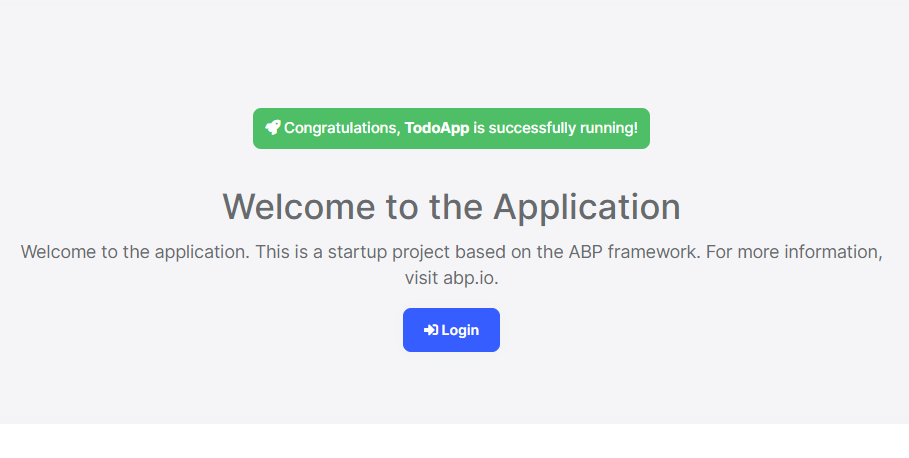
This command takes time, but eventually runs and opens the application in your default browser:

You can click on the Login button and use admin as the username and 1q2w3E* as the password to login to the application.
All right. We can start coding!
Defining the Entity
This application will have a single entity and we can start by creating it. So, create a new TodoItem class under the Entities folder of the project:
using Volo.Abp.Domain.Entities;

namespace TodoApp.Entities;

public class TodoItem : BasicAggregateRoot<Guid>
{
    public string Text { get; set; } = string.Empty;
}
BasicAggregateRoot is the simplest base class to create root entities, and Guid is the primary key (Id) of the entity here.
Database Integration
The next step is to setup the MongoDB configuration. Open the TodoAppDbContext class (under the Data folder) in your project and make the following changes:
- Add a new property to the class:
public IMongoCollection<TodoItem> TodoItems => Collection<TodoItem>();
- Add the following code inside the
CreateModelmethod:
modelBuilder.Entity<TodoItem>(b =>
{
    b.CollectionName = "TodoItems";
});
After the database integrations, now we can start to create application service methods and implement our use-cases.
Creating the Application Service
An application service is used to perform the use cases of the application. We need to perform the following use cases in this application:
- Get the list of the todo items
- Create a new todo item
- Delete an existing todo item
Before starting to implement these use cases, first we need to create a DTO class that will be used in the application service.
Creating the Data Transfer Object (DTO)
Application services typically get and return DTOs (Data Transfer Objects) instead of entities. So, create a new TodoItemDto class under the Services/Dtos folder:
namespace TodoApp.Services.Dtos;

public class TodoItemDto
{
    public Guid Id { get; set; }
    public string Text { get; set; } = string.Empty;
}
This is a very simple DTO class that has the same properties as the TodoItem entity. Now, we are ready to implement our use-cases.
The Application Service Implementation
Create a TodoAppService class under the Services folder of your project, as shown below:
using TodoApp.Services;
using TodoApp.Services.Dtos;
using TodoApp.Entities;
using Volo.Abp.Application.Services;
using Volo.Abp.Domain.Repositories;

namespace TodoApp.Services;

public class TodoAppService : TodoAppAppService
{
    private readonly IRepository<TodoItem, Guid> _todoItemRepository;

    public TodoAppService(IRepository<TodoItem, Guid> todoItemRepository)
    {
        _todoItemRepository = todoItemRepository;
    }

    // TODO: Implement the methods here...
}
This class inherits from the TodoAppAppService, which inherits from the ApplicationService class of the ABP and implements our use-cases. ABP provides default generic repositories for the entities. We can use them to perform the fundamental database operations. This class injects IRepository<TodoItem, Guid>, which is the default repository for the TodoItem entity. We will use it to implement our use cases.
Getting the Todo Items
Let's start by implementing the GetListAsync method, which is used to get a list of todo items:
public async Task<List<TodoItemDto>> GetListAsync()
{
    var items = await _todoItemRepository.GetListAsync();
    return items
        .Select(item => new TodoItemDto
        {
            Id = item.Id,
            Text = item.Text
        }).ToList();
}
We are simply getting the TodoItem list from the repository, mapping them to the TodoItemDto objects and returning as the result.
Creating a New Todo Item
The next method is CreateAsync and we can implement it as shown below:
public async Task<TodoItemDto> CreateAsync(string text)
{
    var todoItem = await _todoItemRepository.InsertAsync(
        new TodoItem {Text = text}
    );

    return new TodoItemDto
    {
        Id = todoItem.Id,
        Text = todoItem.Text
    };
}
The repository's InsertAsync method inserts the given TodoItem to the database and returns the same TodoItem object. It also sets the Id, so we can use it on the returning object. We are simply returning a TodoItemDto by creating from the new TodoItem entity.
Deleting a Todo Item
Finally, we can implement the DeleteAsync as the following code block:
public async Task DeleteAsync(Guid id)
{
    await _todoItemRepository.DeleteAsync(id);
}
The application service is ready to be used from the UI layer. So, let's implement it.
User Interface
It is time to show the todo items on the UI! Before starting to write the code, it would be good to remember what we are trying to build. Here's a sample screenshot from the final UI:

Service Proxy Generation
ABP provides a handy feature to automatically create client-side services to easily consume HTTP APIs provided by the server.
You first need to run the TodoApp project since the proxy generator reads API definitions from the server application.
Once you run the TodoApp project (Swagger API Definition will be shown), open a command-line terminal in the directory of angular folder and run the following command:
abp generate-proxy -t ng
If everything goes well, it should generate an output as shown below:
CREATE src/app/proxy/generate-proxy.json (182755 bytes)
CREATE src/app/proxy/README.md (1000 bytes)
CREATE src/app/proxy/services/todo.service.ts (833 bytes)
CREATE src/app/proxy/services/dtos/models.ts (71 bytes)
CREATE src/app/proxy/services/dtos/index.ts (26 bytes)
CREATE src/app/proxy/services/index.ts (81 bytes)
CREATE src/app/proxy/index.ts (61 bytes)
Then, we can use the TodoService to use the server-side HTTP APIs, as we'll do in the next section.
home.component.ts
Open the /angular/src/app/home/home.component.ts file and replace its content with the following code block:
import { ToasterService } from "@abp/ng.theme.shared";
import { Component, OnInit } from '@angular/core';
import { TodoItemDto } from "@proxy/services/dtos";
import { TodoService } from "@proxy/services";

@Component({
  selector: 'app-home',
  templateUrl: './home.component.html',
  styleUrls: ['./home.component.scss'],
})

export class HomeComponent implements OnInit {

  todoItems: TodoItemDto[];
  newTodoText: string;

  constructor(
      private todoService: TodoService,
      private toasterService: ToasterService)
  { }

  ngOnInit(): void {
    this.todoService.getList().subscribe(response => {
      this.todoItems = response;
    });
  }

  create(): void{
    this.todoService.create(this.newTodoText).subscribe((result) => {
      this.todoItems = this.todoItems.concat(result);
      this.newTodoText = null;
    });
  }

  delete(id: string): void {
    this.todoService.delete(id).subscribe(() => {
      this.todoItems = this.todoItems.filter(item => item.id !== id);
      this.toasterService.info('Deleted the todo item.');
    });
  }
}
We've used TodoService to get the list of todo items and assigned the returning value to the todoItems array. We've also added create and delete methods. These methods will be used on the view side.
home.component.html
Open the /angular/src/app/home/home.component.html file and replace its content with the following code block:
<div class="container">
  <div class="card">
    <div class="card-header">
      <div class="card-title">TODO LIST</div>
    </div>
    <div class="card-body">
      <!-- FORM FOR NEW TODO ITEMS -->
      <form class="row row-cols-lg-auto g-3 align-items-center" (ngSubmit)="create()">
        <div class="col-12">
          <div class="input-group">
            <input name="NewTodoText" type="text" [(ngModel)]="newTodoText" class="form-control" placeholder="enter text..." />
          </div>
        </div>
        <div class="col-12">
          <button type="submit" class="btn btn-primary">Submit</button>
        </div>
      </form>
      <!-- TODO ITEMS LIST -->
      <ul id="TodoList">
        <li *ngFor="let todoItem of todoItems">
          <i class="fa fa-trash-o" (click)="delete(todoItem.id)"></i> {{ todoItem.text }}
        </li>
      </ul>
    </div>
  </div>
</div>
home.component.scss
As the final touch, open the /angular/src/app/home/home.component.scss file and replace its content with the following code block:
#TodoList{
    list-style: none;
    margin: 0;
    padding: 0;
}

#TodoList li {
    padding: 5px;
    margin: 5px 0px;
    border: 1px solid #cccccc;
    background-color: #f5f5f5;
}

#TodoList li i
{
    opacity: 0.5;
}

#TodoList li i:hover
{
    opacity: 1;
    color: #ff0000;
    cursor: pointer;
}
This is a simple styling for the todo page. We believe that you can do much better :)
Now, you can run the application again to see the result.
Conclusion
In this tutorial, we've built a very simple application to warm up with the ABP.
Source Code
You can find the source code of the completed application here.
See Also
- Check the Web Application Development Tutorial to see a real-life web application development in a layered architecture using the Layered Application Startup Template.


